
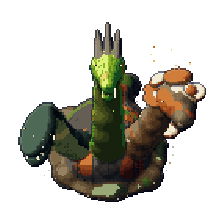
The Green Scar
World boss
- Levels 40–40
- Sized for 5–40 players
- The Drowned Court
Where the Poison Shard fell, a hydra grew in the crater lake: a poison head, a spore head and a drowning head on one sunken body. Three times a day she rises out of The Green Scar. Cut off a head and it tries to grow back.
Getting in
Wakes at The Green Scar, south-west of Bellwater.
Loot and the daily lock
Everyone who did at least 2% of the fight gets a chest of their own, once a day for each boss (the day turns at 04:00), however far above it your level is. A chest left unopened goes into the bag after 10 minutes.
Bosses

The fight (tap to show)
- Mechanic damage
This boss's marks deal a fixed amount set for its level (40), in place of the blow multiples below: a move you could dodge 485 damage, a hazard 425 damage, its signature failed 667 damage, burning ground 146 damage a second. More levels and better gear mean more health, so the same hit takes a smaller part of it. Armour, shields and barriers turn aside at most 20% of it.
- Thrash
It marks a ring round itself (radius 4 tiles); 3.3 s later everyone inside is hit for 2.4 × a normal blow. It keeps still meanwhile.
WhenIn turns, one move every 7.5 s, the first 5 s into the fight.
EnragedA move every 5.5 s; the ring grows to 4.5 tiles.
TipWalk out of the ring at once: in 3.3 s you cover 11.6 tiles, enough even from right next to it.
- Poison Breath
The poison head turns on 3 of the crowd (not the one holding her, while there are others) and marks a cone towards each (60° wide, 11 tiles long); 3.1 s later it breathes poison down them, 2.2 × a normal blow to everyone in one. Each cone leaves 2 green pools (1.3 tiles round) for 9 s: they burn every 1 s.
WhenIn turns, one move every 7.5 s, the first 5 s into the fight.
TipStep out of the cone's side or past its end, and keep out of the green pools after.
- Spore Burst
It marks a circle under each of its 6 nearest foes (radius 2 tiles); 2.6 s later they all come down at once, 1.8 × a normal blow. Each circle leaves a cloud of spores 4 tiles wide for 7 s: it slows to 60% and stings every 1 s.
WhenFrom 66% of its health. In turns, one move every 7.5 s, the first 5 s into the fight.
TipStep out of your own circle, not into a neighbour's; then keep out of the spore clouds.
- Sporeborn
Sporeborn (level 38) come at the crowd from the edge: 2, and one more for every 8 in the fight (at most 6).
WhenFrom 66% of its health, then every 40 s.
TipA few of the crowd turn to them while the rest keep at the boss.
- The Head Grows Back
4 s after a head falls, its stump starts to grow back (9 s, her bar filling). Skills from different players burn it shut: one for every 4 in the fight (1 to 8); otherwise the head is back: she heals 6% of her health and its moves join her turns again. Skills do not burn the spore head's stump: lantern mushrooms glow up round her (7 tiles out), as many as it takes and 2 more. Step onto one and you throw it, alight, at the stump; each player counts once.
WhenWhen phases 2 and 3 begin (66%, 33%).
TipSave a skill for the stump: everyone hits it once with a skill, basic attacks don't count.
- The Drowning Head
It coils round whoever keeps farthest from her (1.5 s ahead) and drags them to the crater pool. Then the pool turns into a whirlpool (8 tiles round its middle), marked 3.6 s ahead: 485 damage to everyone in it, and it swirls on for 4 s, 146 damage to whoever stays every 1 s.
WhenFrom 33% of its health. In turns, one move every 7.5 s, the first 5 s into the fight.
TipDragged in? Walk straight out of the ring: it is 2.5 s more than you need. Everyone else: keep out of the crater while it whirls.
- Rage
It turns red with rage: its normal blows come 1.4 times as often, and every blow hits 30% harder.
WhenAt 30% of its health; it lasts to the end of the fight.
TipThe last part is the most dangerous: save your strong skills and potions for it, and dodge the marks as never before.