
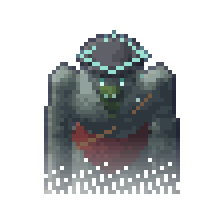
The Wreckers' Grotto
Dungeon
- Level 90+
- 1–5 players
- The Shipwreck Coast
Bosun Grell on his barge, The Lamp Widow on her island in the black water, Captain Saltmarrow on the deck of his sunken ship.
Getting in
At the foot of Gullhaven's cliff, where the wreckers lit their false lights.
Loot and the daily lock
Everyone in the party who took part in the fight (a blow in it, or a heal) gets their own chest, however far above the boss your level is. Gear 5 times a day: kill it a sixth time the same day and only gold and materials come out. The tries renew every day at 04:00.
Alone or in a group
| Players | 1 | 2 | 3 | 4 | 5 |
|---|---|---|---|---|---|
| Health | ×1 | ×1.5 | ×2 | ×2.5 | ×3 |
| Blows | ×1 | ×1.25 | ×1.5 | ×1.75 | ×2 |
The creatures inside grow with the party: health and blows by the number of players. A boss calls more helpers and marks more circles for a bigger party (the counts in its fight read alone / 2–3 / 4–5). Fought alone, a boss's chest holds less gold and is less likely to hold gear.
Floors and who lives there
The Entry Channel
 WreckerLv 86–88 · ×5
The Tidal Cave
- WreckerLv 87 · ×2
 Bosun GrellLv 87
The Drowned Tunnel
 Drowned SailorLv 88 · ×3
The Black Water
 The Lamp WidowLv 88
The Ghost Quay
 Wrecker LamplighterLv 89 · ×3
 Captain SaltmarrowLv 90
Bosses
The fight (tap to show)
- Mechanic damage
This boss's marks deal a fixed amount set for its level (87), in place of the blow multiples below: a move you could dodge 1,776 damage, a hazard 1,554 damage, its signature failed 2,442 damage, burning ground 533 damage a second. More levels and better gear mean more health, so the same hit takes a smaller part of it. Armour, shields and barriers turn aside at most 20% of it.
- Heel
The barge tips to its weight (a player 1, alone 3; Grell 3; each piece of cargo 1), up to 20°; the spirit level under his bar shows it. From 8° the crates and powder kegs slide downhill: a crate knocks you down (1.2 × a normal blow), a keg bursts at the rail (1.8 × within 3 tiles; Grell too, if near). From 14° (alone 12°) Grell slides: into the rail fast he is stunned 3 s; out through an open gap (alone one) he is overboard 8 s and takes 40% more.
When0 s into the fight, then every 9 s.
TipGather on the low side with the tank holding him opposite a gap; step out of the cargo's way.
- Tide
The water floods the low side, marked 2.5 s ahead: whoever is there is Soaked (0.5 × a normal blow).
WhenFrom 60% health, every 40 s.
- Anchor Throw
A line 2.5 s at the farthest: within 4 tiles of its end you are dragged to the deck's far end (1.2 × a normal blow) and your weight goes with you.
WhenFrom 25% health, every 16 s.
- Rage
It flushes red and rages: its normal blows come 1.3× as often, and all its blows are 15% harder.
WhenAt 30% of its health; it lasts to the end of the fight.
TipThe last part is the most dangerous: save your strong skills and potions for it, and dodging the marks matters more than ever.
The fight (tap to show)
- Mechanic damage
This boss's marks deal a fixed amount set for its level (88), in place of the blow multiples below: a move you could dodge 1,818 damage, a hazard 1,591 damage, its signature failed 2,500 damage, burning ground 546 damage a second. More levels and better gear mean more health, so the same hit takes a smaller part of it. Armour, shields and barriers turn aside at most 20% of it.
- Guide Home
A drowned guide with the true lantern walks the stepping stones to her island at 40 px/s (alone 48). Her crew (1/2/3) go for it: a touch holds it 2 s and pulls it back. Her lit lanterns pull it off its way (and you toward them); off its way it falls in the water. Stand 1 s by a lantern to put it out for 20 s. At the island: every lantern dark 15 s, she weeps 6 s and takes 40% more for 10 s. From 50% two guides from two mouths. Every guide lost in the water heals her 3%.
When10 s into the fight, then every 30 s.
TipTank the crew off the guide, put out the lanterns ahead of it, keep striking her.
- Widow's Scream
She screams for 2 s: break it with a skill (she reels 2 s); else everyone within 8 tiles is pushed 4 tiles (1 × a normal blow). From 25% it stops the guides too.
When16 s into the fight, then every 22 s.
- Lamp Oil
Oil under 1/2/3 of you (2 tiles round), set alight by her false lanterns 2 s later, burning 4 s; with every lantern dark it lies cold.
When7 s into the fight, then every 15 s.
- Rage
It flushes red and rages: its normal blows come 1.3× as often, and all its blows are 15% harder.
WhenAt 25% of its health; it lasts to the end of the fight.
TipThe last part is the most dangerous: save your strong skills and potions for it, and dodging the marks matters more than ever.
The fight (tap to show)
- Mechanic damage
This boss's marks deal a fixed amount set for its level (90), in place of the blow multiples below: a move you could dodge 1,968 damage, a hazard 1,722 damage, its signature failed 2,707 damage, burning ground 591 damage a second. More levels and better gear mean more health, so the same hit takes a smaller part of it. Armour, shields and barriers turn aside at most 20% of it.
- Broadside
1/3/4 of the quay's cannons can be taken (stand by one 1 s): the stick turns the barrel, attack fires every 3 s. While his ghost sail stands 80% of your blows don't land. 2/3/4 hits tear it: 10 s without a sail, he reels 3 s and takes 30% more; it is woven again 40 s after. At 50% the ship turns (aim again); from 25% two sails.
When0 s into the fight, then every 40 s.
TipTwo gunners at the far cannons, the tank on the boarders, the rest strike as the sail tears.
- Broadside Fire
6 lanes across the quay in turn, each marked 1.8 s (1.6 × a normal blow).
When12 s into the fight, then every 24 s.
- Boarders
1/2/3 boarding pirates slide down the ropes and go for the gunners.
When18 s into the fight, then every 30 s.
- The Dead Captain's Curse
An anchor on one of you (two from 50%) for 6 s: not on the quay's edge then, 2.2 × a normal blow and held 1.5 s.
When25 s into the fight, then every 26 s.
- Rage
It flushes red and rages: its normal blows come 1.3× as often, and all its blows are 15% harder.
WhenAt 25% of its health; it lasts to the end of the fight.
TipThe last part is the most dangerous: save your strong skills and potions for it, and dodging the marks matters more than ever.