
The Abandoned Mine
Dungeon
- Level 10+
- 1–5 players
- Copper Slopes
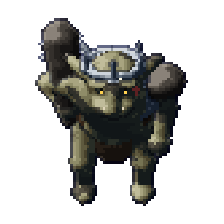
Goblins have overrun all three floors of the old copper mine under Copperhill. In the cave at the very bottom sits the Goblin King, the stolen crown of the kings on his head; where his club comes down, the ground shakes.
Getting in
You go in by the mine mouth on Copperhill.
Loot and the daily lock
Everyone in the party who took part in the fight (a blow in it, or a heal) gets their own chest, however far above the boss your level is. Gear 5 times a day: kill it a sixth time the same day and only gold and materials come out. The tries renew every day at 04:00.
Alone or in a group
| Players | 1 | 2 | 3 | 4 | 5 |
|---|---|---|---|---|---|
| Health | ×1 | ×1.5 | ×2 | ×2.5 | ×3 |
| Blows | ×1 | ×1.25 | ×1.5 | ×1.75 | ×2 |
The creatures inside grow with the party: health and blows by the number of players. A boss calls more helpers and marks more circles for a bigger party (the counts in its fight read alone / 2–3 / 4–5). Fought alone, a boss's chest holds less gold and is less likely to hold gear.
Floors and who lives there
The Abandoned Mine — Floor 1
 Goblin MinerLv 8 · ×3
 Goblin LampmanLv 8 · ×2
 Goblin ScoutLv 8 · ×2
 Goblin ForemanLv 9 · ×3
Floor 2 — The Spirit Cave
 Goblin ShamanLv 9
The Abandoned Mine — Floor 3
- Goblin ScoutLv 9 · ×1
- Goblin LampmanLv 9 · ×1
- Goblin MinerLv 10 · ×1
 Goblin BlasterLv 10 · ×1
 Goblin PillagerLv 10 · ×1
The Abandoned Mine — Floor 2
- Goblin ScoutLv 9 · ×1
- Goblin BlasterLv 9 · ×2
- Goblin PillagerLv 9 · ×2
- Goblin LampmanLv 9 · ×1
- Goblin MinerLv 9 · ×2
Floor 3 — The Sealed Gallery
 Goblin KingLv 10
Bosses
The fight (tap to show)
- Mechanic damage
This boss's marks deal a fixed amount set for its level (9), in place of the blow multiples below: a move you could dodge 106 damage, a hazard 93 damage, its signature failed 146 damage, burning ground 32 damage a second. More levels and better gear mean more health, so the same hit takes a smaller part of it. Armour, shields and barriers turn aside at most 20% of it.
- Totem Shield
It plants totems up to 5 tiles round itself (1/1/2 for 1, 2–3 and 4–5 players). While any of them stands, it takes 50% less damage. At 50% health it plants 1 more, however many you are.
WhenWhen the fight starts, and again at 50% health.
TipBreak the totems first: the shield falls with the last one.
- Ancestors' Mend
It stands still and casts for 3 s, its bar filling over its head. Unless a skill lands on it meanwhile, it heals 8% of its health; broken, it reels for 2 s. In a party it takes skills from different players: 2 for 2–3 players, 3 for 4–5.
When9 s into the fight, then every 22 s.
EnragedEvery 16 s.
TipKeep one skill ready: any skill that lands on it breaks the spell. Basic attacks don't.
- Spirit Fire
Green spirit fire on one of the party: a circle (radius 1.8 tiles) follows them for 6 s (alone 5 s), stops and lands 1.5 s later, 1.4 × a normal blow. A totem in it burns.
When5 s into the fight, then every 15 s.
EnragedEvery 12 s.
TipLead the circle onto a totem, then step out before it lands: the fire breaks the ward for you.
- Rage
It flushes red and rages: its normal blows come 1.3× as often, and all its blows are 10% harder.
WhenAt 30% of its health; it lasts to the end of the fight.
TipThe last part is the most dangerous: save your strong skills and potions for it, and dodging the marks matters more than ever.
The fight (tap to show)
- Mechanic damage
This boss's marks deal a fixed amount set for its level (10), in place of the blow multiples below: a move you could dodge 125 damage, a hazard 109 damage, its signature failed 172 damage, burning ground 37 damage a second. More levels and better gear mean more health, so the same hit takes a smaller part of it. Armour, shields and barriers turn aside at most 20% of it.
- Club Slam
It draws a red circle under its main target's feet (the player who angers it most; radius 2.5 tiles); 1.5 s later it hits everyone inside for 2 × a normal blow. It stands still while the mark lasts.
When4 s into the fight, then every 9 s.
EnragedEvery 6.5 s, and the circle grows (radius 3.3 tiles).
TipWhen the red circle appears, get out of it within 1.5 s. Whoever holds the boss keeps it away from the group, so the circle reaches no one else.
- Powder Keg
He rolls a keg into the middle of the cavern and lights the fuse: the spark runs the powder trail for 3.2 s, then it goes off, 2.5 × a normal blow to everyone within 20 tiles it can see, armour aside. Each blast tips the ore cart nearest him (at most 4): the cover wears away the longer the fight lasts.
When12 s into the fight, then every 21 s.
EnragedEvery 15 s.
TipGet behind a cart, a crate or the rubble, on the far side from the keg: in 3.2 s you walk 11.2 tiles. Whoever holds him keeps him away from the cart the party hides behind.
- Wagon Ride
At 50% health he leaps into a wagon and rides 3 laps of the rails round his floor, out of reach; each stretch of rail is marked 1.5 s before he comes, 1.6 × a normal blow to whoever stands on it. As he rides he lobs powder kegs into the loop, one every 1 s–1.4 s (alone 2.2 s), some at the party and some at random: each is marked 1.6 s ahead (alone 2 s) and bursts 1.8 tiles round, 1.3 × a normal blow. Then he tumbles out, dazed for 3 s.
WhenOnce a fight, at 50% health.
TipStand inside the loop, off the rails, and keep moving: step out of each keg's circle before it bursts. When he tumbles out, everyone hits him: he can't strike back.
- Miners, to me
It shouts: "Miners, to me!" 1/1/2 Goblin Miner (level 9) come and attack the boss's target.
WhenAt 75% and 45% of its health, once each.
TipCut down the newcomers first: whoever holds the boss keeps holding it, the others turn on the helpers. Use your area skills here.
- Rage
It flushes red and rages: its normal blows come 1.4× as often, and all its blows are 15% harder.
WhenAt 30% of its health; it lasts to the end of the fight.
EnragedClub Slam every 6.5 s.
TipThe last part is the most dangerous: save your strong skills and potions for it, and dodging the marks matters more than ever.