
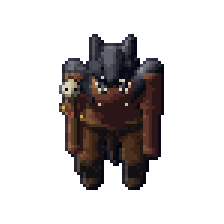
The Wolf Den
Dungeon
- Level 15+
- 1–5 players
- Wolfwood
The Wolfkin's den, dug among the roots. Blackgale and its black wolves hold the gate, The Great Pelt holds the hall, and Odo's carters sit in a stake pen. Someone pays the Wolfkin to keep the forest busy.
Getting in
Through the den's mouth under the rocky knoll in Wolfwood's south-east.
Loot and the daily lock
Everyone in the party who took part in the fight (a blow in it, or a heal) gets their own chest, however far above the boss your level is. Gear 5 times a day: kill it a sixth time the same day and only gold and materials come out. The tries renew every day at 04:00.
Alone or in a group
| Players | 1 | 2 | 3 | 4 | 5 |
|---|---|---|---|---|---|
| Health | ×1 | ×1.5 | ×2 | ×2.5 | ×3 |
| Blows | ×1 | ×1.25 | ×1.5 | ×1.75 | ×2 |
The creatures inside grow with the party: health and blows by the number of players. A boss calls more helpers and marks more circles for a bigger party (the counts in its fight read alone / 2–3 / 4–5). Fought alone, a boss's chest holds less gold and is less likely to hold gear.
Floors and who lives there
The Wolfkin Camp
 WolfkinLv 12–13 · ×4
 Wolfkin ArcherLv 12 · ×1
 Wolfkin RoperLv 13 · ×1
 Shadow LynxLv 13 · ×1
The Wolf Den
 Black WolfLv 12 · ×3
The Bone Pit
 Pack LeaderLv 13 · ×1
- Black WolfLv 13 · ×3
The Passage
- Shadow LynxLv 14 · ×1
- WolfkinLv 14 · ×2
- Wolfkin RoperLv 14 · ×1
Blackgale's Gate
 BlackgaleLv 14
The Great Pelt's Hall
- WolfkinLv 14 · ×2
 The Great PeltLv 15
Bosses
The fight (tap to show)
- Mechanic damage
This boss's marks deal a fixed amount set for its level (14), in place of the blow multiples below: a move you could dodge 155 damage, a hazard 136 damage, its signature failed 213 damage, burning ground 47 damage a second. More levels and better gear mean more health, so the same hit takes a smaller part of it. Armour, shields and barriers turn aside at most 20% of it.
- Charge
It lowers its head and marks a lane through the player farthest from it (1.8 tiles wide, 6–12 tiles long); 1.3 s later it runs the lane (19.4 tiles a second) and hits everyone in its path for 2.2 × a normal blow.
WhenIn turn: Charge; one move every 7.5 s, the first 5 s into the fight.
EnragedMoves every 5.2 s. It runs faster (23.8 tiles a second).
TipStanding far off doesn't help: it runs at the farthest one. Step to the side of the lane, not to its end; 0.9 tiles sideways is enough.
- Aroooo
It shouts: "Aroooo!" 1/1/2/3/3 Black Wolf (level 13) come and attack the boss's target.
WhenAt 70% and 35% of its health, once each.
TipCut down the newcomers first: whoever holds the boss keeps holding it, the others turn on the helpers. Use your area skills here.
- Black Ring
It howls and its pack rings the party: 4/5/6 Black Shades (alone/2–3/4–5) on a circle 5 tiles round them, Blackgale itself one more link. The band fills in 6 s (7 s alone); then the shades still standing lunge at the middle (1 blows each, 2 at most). A shade falls to a skill or a few blows and leaves a gap; crossing the ring anywhere else bites (0.6 blows, slowed), beside Blackgale 1.6. The shades still standing rise as black wolves (1/1/3/3/3 at most).
When12 s into the fight, then every 24 s.
EnragedEvery 19 s.
TipCut a shade on the far side from Blackgale and go out through its gap together. In the black wind's dark only their eyes show; a shade in a fire's light takes 2× the blows.
- The Pack's Prey
Each time its wolves come, one of the party (not the one it fights, when there is another) is their prey for 6 s: a red claw over their head, and the wolves run at them.
WhenWhen its wolves come.
TipThe tank takes them (Challenge), or the prey runs them to the tank.
- Black Wind
A long howl puts 1/2/2 of the gate's fires out (alone/2–3/4–5): the gate goes dark for 20 s (12 s alone) or until they burn again, and its wolves bite 20% harder in the dark.
WhenOnce, at 50% health.
TipLight the fires again (use them): the dark ends and it reels 1.5 s.
- Rage
It flushes red and rages: its normal blows come 1.3× as often, and all its blows are 15% harder.
WhenAt 30% of its health; it lasts to the end of the fight.
EnragedMoves every 5.2 s.
TipThe last part is the most dangerous: save your strong skills and potions for it, and dodging the marks matters more than ever.
The fight (tap to show)
- Mechanic damage
This boss's marks deal a fixed amount set for its level (15), in place of the blow multiples below: a move you could dodge 164 damage, a hazard 144 damage, its signature failed 226 damage, burning ground 49 damage a second. More levels and better gear mean more health, so the same hit takes a smaller part of it. Armour, shields and barriers turn aside at most 20% of it.
- Stomp
It draws a red ring round itself (radius 3.3 tiles); 1.6 s later it hits everyone inside for 2.2 × a normal blow. It stands still while the mark lasts.
WhenIn turn: Stomp and Spirit Wolves and Ember Kick; one move every 7.5 s, the first 5 s into the fight.
EnragedMoves every 5.5 s. The ring grows (radius 4 tiles).
TipAs soon as the ring appears, move away from the boss: walking, you cover 5.6 tiles in 1.6 s, enough even from right beside it. Then come back and keep hitting.
- Spirit Wolves
It marks lanes from itself through the party (2/3/4 for 1, 2–3 and 4–5 players), 1.5 tiles wide; 1.7 s later spirit wolves run them and hit everyone they pass for 1.8 × a normal blow.
WhenIn turn: Stomp and Spirit Wolves and Ember Kick; one move every 7.5 s, the first 5 s into the fight.
EnragedMoves every 5.5 s.
TipStep sideways out of your lane (0.8 tiles is enough): running along it doesn't help.
- The pack is one
It shouts: "The pack is one!" 1/2/3 Wolfkin (level 14) come and attack the boss's target.
WhenAt 75% and 30% of its health, once each.
TipCut down the newcomers first: whoever holds the boss keeps holding it, the others turn on the helpers. Use your area skills here.
- The Pelt's Spirit
In its first phase its pelt's spirit leaps out as a Spirit Wolf with 6% of its health for 12 s, biting the nearest. Stand within 3 tiles of it and strike it not: its trust fills in 5 s/3.3 s/2.5 s (one/two/three by it). A blow aimed at it takes 35% of the trust off; area blows never touch it. Tamed, it turns on the Pelt for 10 s: it bites it (1% of its health each), its lanes run through it (2% each) and the Pelt takes 15% more. Neither tamed nor killed, it goes back into the pelt and heals it 3%.
When12 s into the fight, then every 24 s.
EnragedEvery 18 s.
TipThe tank keeps the Pelt off the wolf; the healer and one more stand by it. Killing the wolf stops the heal, but gives nothing.
- Shed Pelt
Its pelt rises as the Great Spirit Wolf, a Spirit Wolf with 15% of its health: tamed as its spirits are, only slower (8 s/5.3 s/4 s with one/two/three by it). Every 15 s it calls it back ("Come back to me!", 3 s; skills from 1/2/3 players break it): through, the trust is lost and the wolf heals it 5%. Tamed, the wolf fights it to the end: its lanes run through the Pelt (3% each), the Pelt takes 20% more and its Wolfkin come no more. Neither tamed nor killed in 30 s, it goes back into the pelt and heals it 10%.
WhenAt 50% health, the second phase; again if the wolf went back.
TipTame it and break its call. Killing the wolf is the old way: the bond breaks and it reels 1.5 s, but there is no reward.
- Ember Kick
It kicks its fire: 3 circles 1.5 tiles round, under the party and near them, land in 1.6 s (1.6 blows) and burn the ground for 6 s.
WhenOne of its turns.
TipStep out of the circles, and off the burning ground.
- Rage
It flushes red and rages: its normal blows come 1.3× as often, and all its blows are 15% harder.
WhenAt 30% of its health; it lasts to the end of the fight.
EnragedMoves every 5.5 s.
TipThe last part is the most dangerous: save your strong skills and potions for it, and dodging the marks matters more than ever.