
Emberhearth
Dungeon
- Level 60+
- 1–5 players
- The Caldera
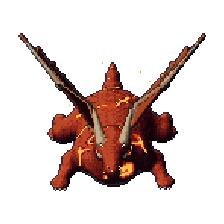
The guild's great forge, where the crown was made. Garrow, the High Kindler, holds its rite hall; past it his hound Scorchfang; in the great furnace the Crimson Wyrm the Kindled have fed for years sleeps on the shard's embers, by the anvil the crown was struck on.
Getting in
Through the arch carved in The Caldera's north-west wall, above the broken rite stones.
Loot and the daily lock
Everyone in the party who took part in the fight (a blow in it, or a heal) gets their own chest, however far above the boss your level is. Gear 5 times a day: kill it a sixth time the same day and only gold and materials come out. The tries renew every day at 04:00.
Alone or in a group
| Players | 1 | 2 | 3 | 4 | 5 |
|---|---|---|---|---|---|
| Health | ×1 | ×1.5 | ×2 | ×2.5 | ×3 |
| Blows | ×1 | ×1.25 | ×1.5 | ×1.75 | ×2 |
The creatures inside grow with the party: health and blows by the number of players. A boss calls more helpers and marks more circles for a bigger party (the counts in its fight read alone / 2–3 / 4–5). Fought alone, a boss's chest holds less gold and is less likely to hold gear.
Floors and who lives there
Emberhearth
 Kindled FlamecallerLv 57–59 · ×2
 Lava ElementalLv 57–58 · ×3
 CinderhoundLv 57–59 · ×7
 Obsidian GolemLv 58–59 · ×3
 Ash WraithLv 58–59 · ×2
 Ember WyrmlingLv 58 · ×3
The Rite Hall
 The High KindlerLv 58
The Kennel Pit
 ScorchfangLv 59
The Great Furnace
 The Crimson WyrmLv 60
Bosses
The fight (tap to show)
- Mechanic damage
This boss's marks deal a fixed amount set for its level (58), in place of the blow multiples below: a move you could dodge 802 damage, a hazard 702 damage, its signature failed 1,103 damage, burning ground 241 damage a second. More levels and better gear mean more health, so the same hit takes a smaller part of it. Armour, shields and barriers turn aside at most 20% of it.
- Hammer Arc
A 120° cone before him, 4 tiles long, at whoever holds him; 1.3 s after the mark: 2.8 × a normal blow.
When5 s into the fight, then every 9 s.
EnragedEvery 7.5 s.
TipBehind him is safe; the one holding him steps out of the cone.
- Blessing of Flame (interruptible)
He stops and casts for 3 s; a break bar shows under him: 1%/1.5%/2% of his health (1, 2–3, 4–5 players). Damage fills it, a stunning skill fills 50% of it at once. Full: he is stunned for 3 s and takes 15% more for 6 s. Not: he heals 4% and hits 25% harder for 15 s.
When12 s into the fight, then every 25 s.
TipEveryone hits him; save a stun (Shield Bash, Concussive Shot, Pommel Strike…) for it. A class without one still breaks it with damage.
- The Kindling
For 24 s his priests on the pillars go into a trance and 1/1/2/3/3 gold beams reach him (for 1, 2, 3, 4, 5 players). Stepping into a beam cuts it there, and burns: 2% at first, 1 % more every 3 s; it fades 4 s after stepping out. Every second a beam reaches him another ray of the sun over him lights; at 15 he is crowned (it only strengthens him, nobody takes a hit), and the Ember King to the end: 40% harder and a ring of fire 3 tiles round him (4% a second). The rite over with fewer than 5 rays lit, it is broken: he reels for 3 s.
WhenAt 60% and 30% of his health.
TipTake turns: in a party there is at least one beam fewer than you, so one rests and is healed while the others cut ("I'm burning, take it!"). With three beams, one standing right at his feet between the south beam and a side one cuts both with a single burn. Keep the sun under five rays and the rite breaks. A lone player cuts the one beam at his feet while hitting him.
- Rage
It flushes red and rages: its normal blows come 1.3× as often, and all its blows are 15% harder.
WhenAt 25% of its health; it lasts to the end of the fight.
TipThe last part is the most dangerous: save your strong skills and potions for it, and dodging the marks matters more than ever.
The fight (tap to show)
- Mechanic damage
This boss's marks deal a fixed amount set for its level (59), in place of the blow multiples below: a move you could dodge 824 damage, a hazard 721 damage, its signature failed 1,132 damage, burning ground 247 damage a second. More levels and better gear mean more health, so the same hit takes a smaller part of it. Armour, shields and barriers turn aside at most 20% of it.
- The Scent
A paw over one of the party (not the one holding it, while there is another), 1.5 s ahead; then it chases them for 8 s/10 s/10 s · 10 s/12 s/12 s (phase 1 / 2; 1, 2–3, 4–5 players) at 3.1 tiles (you walk faster), leaving a burning trail (0.9 tiles round, 8 s / 8 s, 247 damage a second). The chase over, it pounces where they stand: 2.3 tiles round, 1.5 s ahead, 2.8 × a normal blow; caught on the way, it bites at once: 1,132 damage.
When8 s into the fight, then every 22 s.
TipRun along the walls and round the pillars: the longer you keep ahead, the wearier it gets; then step out of the pounce.
- Weariness
A gauge over its head fills 10 a second of a chase in which it has not caught its prey (more against a lone player), up to 100. Caught, it bites and keeps 50% of it. Full: WINDED, it drops for 6 s, tongue out, and takes 40% more from every blow.
WhenEvery chase.
TipThe one it chases keeps running round the pillars; everyone saves their strongest blows for the winded hound.
- Ember Breath
A 90° cone, 5 tiles long, at whoever holds it; 1.4 s ahead: 2.8 × a normal blow and Ember Bite for 8 s (it can be cleansed, or it runs out).
When6 s into the fight, then every 10 s.
EnragedEvery 8 s.
TipThe one holding it turns it away from the others.
- The Cinderhounds answer the howl
It shouts: "The Cinderhounds answer the howl!" 1/2/2 Cinderhound (level 57) come and attack the boss's target.
WhenAt 50% of its health, once each.
TipKill them first.
- Rage
It flushes red and rages: its normal blows come 1.3× as often, and all its blows are 15% harder.
WhenAt 20% of its health; it lasts to the end of the fight.
TipThe last part is the most dangerous: save your strong skills and potions for it, and dodging the marks matters more than ever.
The fight (tap to show)
- Mechanic damage
This boss's marks deal a fixed amount set for its level (60), in place of the blow multiples below: a move you could dodge 876 damage, a hazard 766 damage, its signature failed 1,204 damage, burning ground 263 damage a second. More levels and better gear mean more health, so the same hit takes a smaller part of it. Armour, shields and barriers turn aside at most 20% of it.
- Crimson Claw
Every 6 s it claws whoever holds it within 3.5 tiles (1.2 × a normal blow) and stacks Crimson Claw on them (10% more damage taken a stack). At 5 the claw rises: 1.5 s later 6.1 × a normal blow, if they are still in reach. One out of its reach for 3 s loses the stacks, and it beats its wings: a ring 4 tiles round it, 2 s ahead.
WhenEvery 6 s while it is on the ground (phases 1 and 3).
TipSwap at 3–4 stacks with a taunt; alone, step out of reach for a moment and out of the wings' ring.
- Wyrm Breath
A long 70° cone, 8 tiles, at whoever holds it; 1.6 s ahead: 5 × a normal blow and Dragon Fire for 8 s (it can be cleansed, or it runs out).
When7 s into the fight, then every 12 s.
EnragedEvery 10 s.
TipThe one holding it keeps its face away from the party; everyone else stands at its sides.
- Tail Sweep
Anyone behind it for 2 s draws its tail: a 120° cone behind it, 5 tiles long, 1.5 s ahead: 3.3 × a normal blow.
WhenWhenever someone stays 2 s behind it (at most every 6 s).
TipStand at its sides, not behind it.
- Ember Rain
A circle 2 tiles round follows each of 1/3/5 of the party for 3 s (1, 2–3, 4–5 players), stops, and lands 1.5 s later: 2.2 × a normal blow.
When10 s into the fight, then every 20 s.
TipSpread out, then step out of your circle once it stops.
- Flight and Deep Breath
It takes to the air for at most 40 s: out of reach, its shadow over the hall. 3 Deep Breaths, every 8 s: from one side a third of the hall glows for 2.5 s, then everyone in it takes 876 damage. Its wyrmlings come down from the nest (2/3/5; 1, 2–3, 4–5 players). It lands in the middle once they are dead (or the time is up): a ring 5 tiles round, 2.5 s ahead, 3.9 × a normal blow; it eats each wyrmling left (+3% health each).
WhenAt 70% of its health.
TipMove to another band when one glows; kill the wyrmlings fast; leave the middle before it lands.
- Overflow
The side channels glow for 4 s, then flood 3 tiles into the hall for 15 s: 263 damage a second and slowed by 50%.
WhenFrom 40% of its health, every 30 s.
TipKeep to the middle while the channels run over.
- Wing Buffet
It rears for 2.5 s, wings wide; then everyone within 9 tiles of it is thrown 5 tiles straight away from it. Where you will land is drawn at your feet (a white arrow and ring) the whole wind-up. Thrown against a wall you crash into it: 1,204 damage; landed in an overflowing channel's strip, you burn there.
WhenEvery 18 s on the ground (phases 1 and 3).
TipRead the ring at your feet; when it rears keep the channels in front of you, never at your back. Whoever holds it walks back after the throw.
- The Last Storm
It leaps to three sides of the furnace in turn (numbered 1, 2, 3 on the floor) and rears on each: three buffets in a row while the channels run over. Its health holds until it comes. Then it lies tired for 10 s, taking 50% more from every blow.
WhenAt 6% of its health.
TipBefore each leap, stand where its throw lands you in the middle of the hall; then everything at it while it is tired.
- Hard enrage
Its time is up: it goes berserk, its blows 2 × as often and 200 % harder, to the end of the fight.
When10:00 into the fight, whatever its health (its bar counts it down).
TipBring it down before the time runs out.
- Rage
It flushes red and rages: its normal blows come 1.3× as often, and all its blows are 15% harder.
WhenAt 40% of its health; it lasts to the end of the fight.
TipThe last part is the most dangerous: save your strong skills and potions for it, and dodging the marks matters more than ever.