
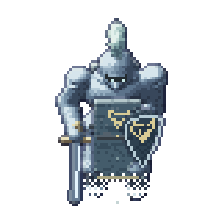
The Silent Hold
Dungeon
- Level 19+
- 1–5 players
- Crownroad Heights
The Roadwardens' old customs fort, where The Silent Watch died keeping the road on Crown Night. The Red Fox's diggers rob its outer yard, The Grave Warden counts the dead in its crypts, and The Silent Captain still holds its tower roof.
Getting in
Through the gate of the old customs fort on the Crownroad, north of Crownroad Post. The Standard-Bearer's Ghost keeps it.
Loot and the daily lock
Everyone in the party who took part in the fight (a blow in it, or a heal) gets their own chest, however far above the boss your level is. Gear 5 times a day: kill it a sixth time the same day and only gold and materials come out. The tries renew every day at 04:00.
Alone or in a group
| Players | 1 | 2 | 3 | 4 | 5 |
|---|---|---|---|---|---|
| Health | ×1 | ×1.5 | ×2 | ×2.5 | ×3 |
| Blows | ×1 | ×1.25 | ×1.5 | ×1.75 | ×2 |
The creatures inside grow with the party: health and blows by the number of players. A boss calls more helpers and marks more circles for a bigger party (the counts in its fight read alone / 2–3 / 4–5). Fought alone, a boss's chest holds less gold and is less likely to hold gear.
Floors and who lives there
The Keep
 Relic HunterLv 17 · ×2
 Relic Hunter CrossbowmanLv 17 · ×1
 Barrow GuardLv 17 · ×2
The Grave Tunnels
- Barrow GuardLv 17 · ×9
 Bone HurlerLv 17 · ×3
The Outer Yard
- Relic HunterLv 17 · ×9
- Relic Hunter CrossbowmanLv 17 · ×3
 Relic Hunter Oil ThrowerLv 17 · ×1
 The Red FoxLv 17
The Warden's Crypt
 The Grave WardenLv 18
The Tower Stair
- Barrow GuardLv 19 · ×1
- Bone HurlerLv 19 · ×1
The Tower Roof
 The Silent CaptainLv 19
Bosses
The fight (tap to show)
- Mechanic damage
This boss's marks deal a fixed amount set for its level (17), in place of the blow multiples below: a move you could dodge 183 damage, a hazard 160 damage, its signature failed 252 damage, burning ground 55 damage a second. More levels and better gear mean more health, so the same hit takes a smaller part of it. Armour, shields and barriers turn aside at most 20% of it.
- Smoke and Mirrors
It vanishes in a puff of smoke; a circle (radius 2 tiles) marks a spot behind one of the party, and 1.4 s later it steps out of the smoke there and strikes the circle, 2.2 × a normal blow. It likes the one it is not fighting.
When7 s into the fight, then every 14 s.
EnragedEvery 10 s.
TipWhen the smoke puffs, look for the circle and step out of it: in 1.4 s you walk 4.9 tiles.
- Oil and Fire Arrows
His hunters throw oil at the party's feet (1/2/3 pools for 1, 2–3 and 4–5 players, radius 1.8 tiles); 2.6 s later burning arrows set them alight and they burn for 4 s: whoever stands in one is hit every 1 s, 0.9 × a normal blow.
When12 s into the fight, then every 18 s.
EnragedEvery 13 s.
TipStep off the dark oil before the arrows come (2.6 s), and don't fight standing in a burning pool.
- Escape
He leaps off in smoke and runs for a dig pit's tunnel or the rope over the west wall, his way drawn gold (3.6 tiles a second; 3.1 against a lone player). Come within 1.3 tiles of him, or stun or slow him: a catch, and he stumbles 1 s. Catches from 1/2/3 different players hold him: he reels 4 s, every blow on him 25% more. If he gets there he climbs onto the wall and takes back 3% of his health.
When12 s into the fight, then every 22 s.
EnragedEvery 17 s.
TipDon't run behind him, cut across his way; the tank's charge is the first catch.
- Boys!
2 of his men stay up on the wall: an aimed line at one of you every 5 s (1.6 blows). As he runs he spills oil that catches fire 1.2 s later and burns 4 s.
WhenAt 50% health.
TipWhoever runs right behind him pays for it: cut the corner.
- Aimed Shot
Every third shot of a Relic Hunter Crossbowman in the Hold is a heavy bolt down a thin red line (0.5 tiles wide, 1.4 s to see it), 1.6 blows to whoever it passes.
WhenThe packs' crossbowmen, and the Fox's
TipStep off the line, or behind a Barrow Guard: its shield stops the bolt.
- On the Wall
He leaps onto the wall, out of reach for 8 s; his men there loose aimed lines at 1/2/3 of you every 2 s (1.6 blows), his hunters' oil comes down, and he drops back in smoke onto a marked spot.
WhenWhen he gets away on his run
TipHide in the smoke he leaves behind, or keep stepping off the red lines.
- Smoke Bomb
A cloud 2.3 tiles round for 7 s: whoever stands in it is not seen and takes no blows, but cannot strike either.
WhenWhere he climbs onto the wall
TipA hiding place from the lines, not a place to fight from.
- Rage
It flushes red and rages: its normal blows come 1.3× as often, and all its blows are 15% harder.
WhenAt 30% of its health; it lasts to the end of the fight.
TipThe last part is the most dangerous: save your strong skills and potions for it, and dodging the marks matters more than ever.
The fight (tap to show)
- Mechanic damage
This boss's marks deal a fixed amount set for its level (18), in place of the blow multiples below: a move you could dodge 193 damage, a hazard 169 damage, its signature failed 265 damage, burning ground 58 damage a second. More levels and better gear mean more health, so the same hit takes a smaller part of it. Armour, shields and barriers turn aside at most 20% of it.
- Bone Rain
It marks a circle under each of its nearest foes (2/3/4 for 1, 2–3 and 4–5 players; radius 1.6 tiles); 1.5 s later bones come down in all of them at once, 1.8 × a normal blow. It counts aloud: "...forty-one, forty-two..."
When6 s into the fight, then every 11 s.
EnragedEvery 8 s.
TipStep out of your own circle, not into a neighbour's: keep a little apart.
- Wrap the Chain
He counts the dead to forty-three (7 s; 8 s alone; no skill breaks it) while his grave-chain binds two of you (two pairs for 4–5; alone, you and a cairn). Draw the chain's line across his body for 0.6 s: the count breaks, he is bound 3 s and takes 20% more for 6 s. A chain longer than 9 tiles drags its ends together. Not wrapped: the dead rise, the chained are pulled into the ground and his blows grow 1.1× for the fight (I, II, III over his head).
When10 s into the fight, then every 20 s.
EnragedEvery 15 s.
TipThe tank holds him still in the open; the chained pair cross to either side of him.
- Forty-three Graves
The chain becomes a triangle of three (two of you and a cairn; alone, you and two cairns): bring him inside it for 0.6 s.
WhenAt 50% health.
TipSpread round him so he stands in the middle; alone, keep him between the cairns.
- Lantern Sweep
A cold cone 90° wide and 5 tiles long at whoever he fights, 1.6 s to see it (2 s alone), 1.6 blows.
When8 s into the fight, then every 14 s.
EnragedEvery 10 s.
TipThe tank meets it; everyone else stands behind him.
- Rage
It flushes red and rages: its normal blows come 1.3× as often, and all its blows are 15% harder.
WhenAt 30% of its health; it lasts to the end of the fight.
EnragedBone Rain every 8 s.
TipThe last part is the most dangerous: save your strong skills and potions for it, and dodging the marks matters more than ever.
The fight (tap to show)
- Mechanic damage
This boss's marks deal a fixed amount set for its level (19), in place of the blow multiples below: a move you could dodge 202 damage, a hazard 177 damage, its signature failed 278 damage, burning ground 61 damage a second. More levels and better gear mean more health, so the same hit takes a smaller part of it. Armour, shields and barriers turn aside at most 20% of it.
- The Oath
It draws a red ring round itself (radius 3 tiles); 1.5 s later it hits everyone inside for 2 × a normal blow. It stands still while the mark lasts.
WhenIn turn: Shield Rush and The Oath; one move every 7.5 s, the first 5 s into the fight.
EnragedMoves every 5.5 s. The ring grows (radius 3.8 tiles).
TipAs soon as the ring appears, move away from the boss: walking, you cover 5.3 tiles in 1.5 s, enough even from right beside it. Then come back and keep hitting.
- Shield Rush
It lowers its head and marks a lane through the player farthest from it (1.9 tiles wide, 5–11 tiles long); 1.3 s later it runs the lane (18.8 tiles a second) and hits everyone in its path for 2.2 × a normal blow.
WhenIn turn: Shield Rush and The Oath; one move every 7.5 s, the first 5 s into the fight.
EnragedMoves every 5.5 s. It runs faster (22.5 tiles a second).
TipStanding far off doesn't help: it runs at the farthest one. Step to the side of the lane, not to its end; 0.9 tiles sideways is enough.
- None Pass
Its charge turn becomes 3 charges back to back, each marked 1.3 s ahead, each at another of its foes.
WhenFrom 33% of its health.
TipAs soon as one lane is run, look for the next: step aside, never run along it.
- None Pass
His sword in the roof (1.5 s) and the Watch's spears rise across it on a line through him; in its middle a gold gate (9 tiles / 10 tiles / 12 tiles wide: alone / 2–3 / 4–5) he keeps like a goalkeeper, sliding 4.7 tiles a second to the one nearest it, 0.5 s behind them; his shield throws back whoever comes within 1.5 tiles. Get 1/1/2 of you past him through the gate within 6 s (7 s alone): he reels 4 s and takes 25% more for 8 s. Through the spears: 1.2 blows and thrown back. None through: the spears come down on your side (1.4 blows) and his shield takes a notch (his blows 1.08× for the fight).
When10 s into the fight, then every 22 s.
EnragedEvery 17 s.
TipSplit up and feint: he follows the one nearest the gate. A stun or the tank's taunt pins him 1.5 s; Shadow Step behind him counts.
- The Watch's Ghost
A Watch ghost keeps the gate with him (3.4 tiles a second; it throws back as he does): 1/2/3 of you must get past.
WhenAt 66% health.
TipTwo keepers: three ways through. One feints each, the rest go.
- The Last Watch
While the gate stands the spear line marches on your side (0.75 tiles a second); its spears bite 0.5 blows every 1 s and push you back.
WhenAt 33% health.
TipGet past early: your side only grows smaller.
- The Watch Stands
As each phase begins he drives his sword into the roof and is out of reach for 1.5 s; the bell tolls and the Watch's ghosts stand by him.
WhenAt 66% and 33%
TipBreathe, and get ready for the new rule.
- Rushes 1-2-3
His three rushes are marked at once and numbered; they fill and run in order, 0.5 s apart.
WhenFrom 33%, in his turns
TipRead the numbers: stand where the third will not come.
- The Oath Ring
His oath goes out as a ring from him to 8.1 tiles, with a gap 60° wide marked 2 s ahead; 2 blows to whoever it passes.
WhenFrom 33%, in his turns (instead of the oath round him)
TipStep into the gap before the ring reaches you.
- The Watch's Banners
Three fallen banners: the keep, the grave tunnels, the tower stair. Stand at one 2 s to raise it: no restless shade rises in its hall again; all three, and the Captain's gate is 2 tiles wider.
WhenBefore the Captain, any time
TipOptional: skip them and the fight is as it was.
- Hard enrage
Its time is up: it goes berserk, its blows 2 × as often and 200 % harder, to the end of the fight.
When9:00 into the fight, whatever its health (its bar counts it down).
TipBring it down before the time runs out.
- Rage
It flushes red and rages: its normal blows come 1.3× as often, and all its blows are 15% harder.
WhenAt 30% of its health; it lasts to the end of the fight.
EnragedMoves every 5.5 s.
TipThe last part is the most dangerous: save your strong skills and potions for it, and dodging the marks matters more than ever.